Intangible Interactions Blog
Back to Spring 2023 courses
Final proposal idea: rebuilding the Tower of Babel - 04.03.2023
We had no idea what to do. So we played the speed ideation game that Yeseul taught us three times.
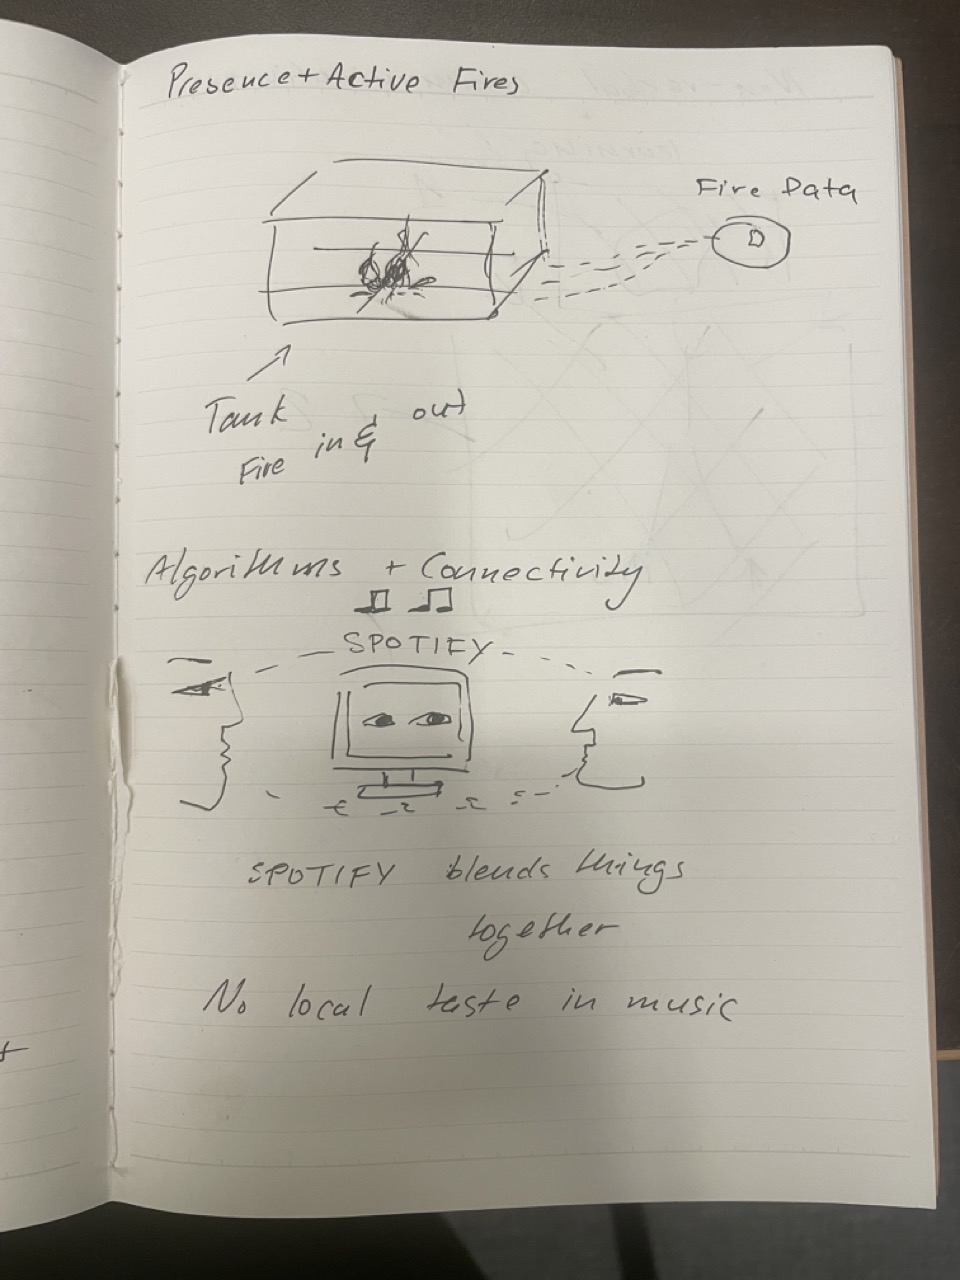

None of the ideas were groundbreaking, but it got us talking about the Spotify song selection algorithm and how even though Dror and I grew up in two different parts of the world at different times, we still had very similar taste in music and knew so many of the same ‘random’ songs (thank you Spotify!).
Inspired by this, we thought of other algorithms that affect our communication and interpersonal relationships. We remembered an article by social psychologist Jonathan Haidt, where he used the fall of Babel Tower as a metaphor for the current state of social media. In the article, he takes us through what it would feel like to live after the destruction of Babel in the Book of Genesis, after God confused people’s languages as a punishment for their attempt to reach the heavens. Similar to this feeling, social media promised to unite the world, but instead, made us ”...disoriented, unable to speak the same language or recognize the same truth,” he claims.
We wanted to explore the idea of embracing algorithms in building relationships and their role in breaking cultural and language barriers. As Haidt suggests, so much of our communication today is broken with algorithms responsible for radical polarization and the spread of misinformation. We wanted to build a communication tool that does the opposite, one that helps us rebuild the tower of Babel and highlights the algorithms’ potential to connect us (and their limitations).
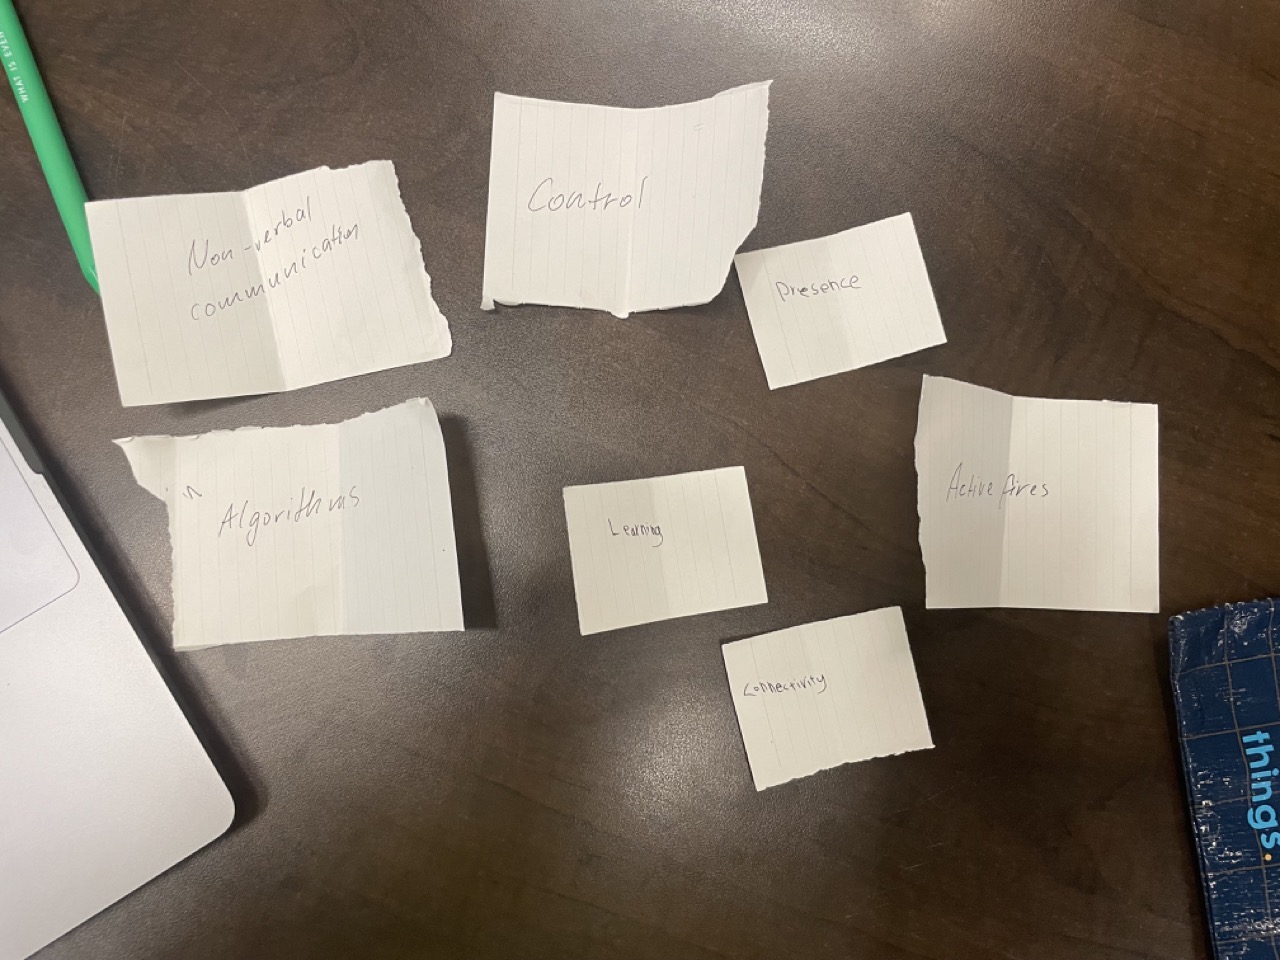
So here is the interaction that we came up with:
1. First, two people who are about to engage in a conversation provide a set of 3-5 adjustives they identify with and that describe them (potentially using fridge magnets and computer vision).
2. Then one person (the speaker) is prompted to say something to the other person (the listener) to get to know them, in the language they are most comfortable with. The listener does not directly hear the speakers voice.
3. The speaker’s voice is recorded --> language is detected, and the speech is translated to text --> text is translated into English using Google Translate API --> the phrase is reformatted using ChatGPT API to be more suitable for the listener’s self-identification --> the new text is translated into the listener’s language using Google Translate API
4. The new tailored and reformatted text is read out to the listener by a digitally generated voice, while the speaker and listener look at each other.
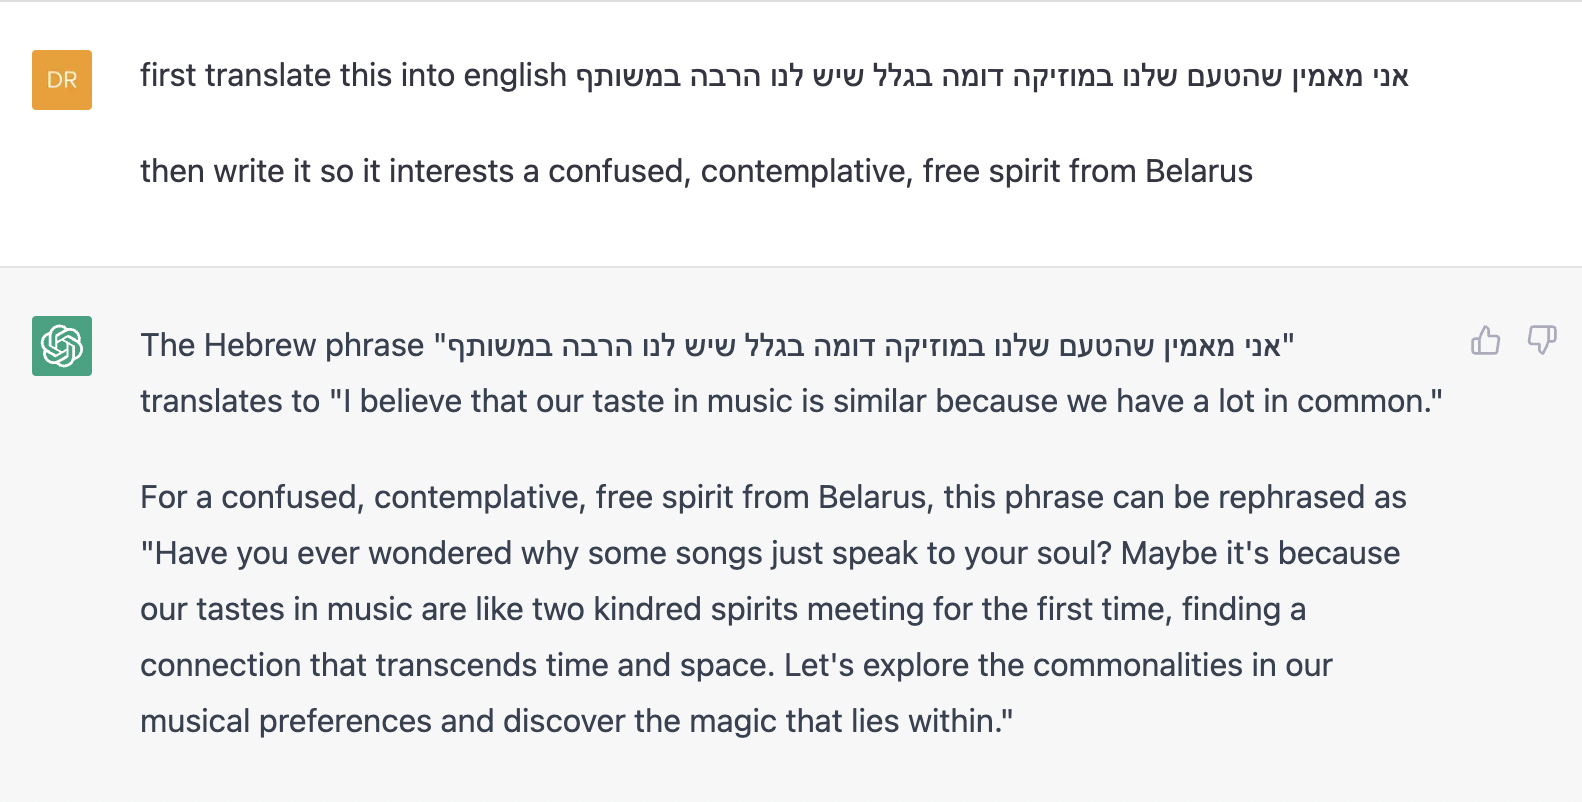
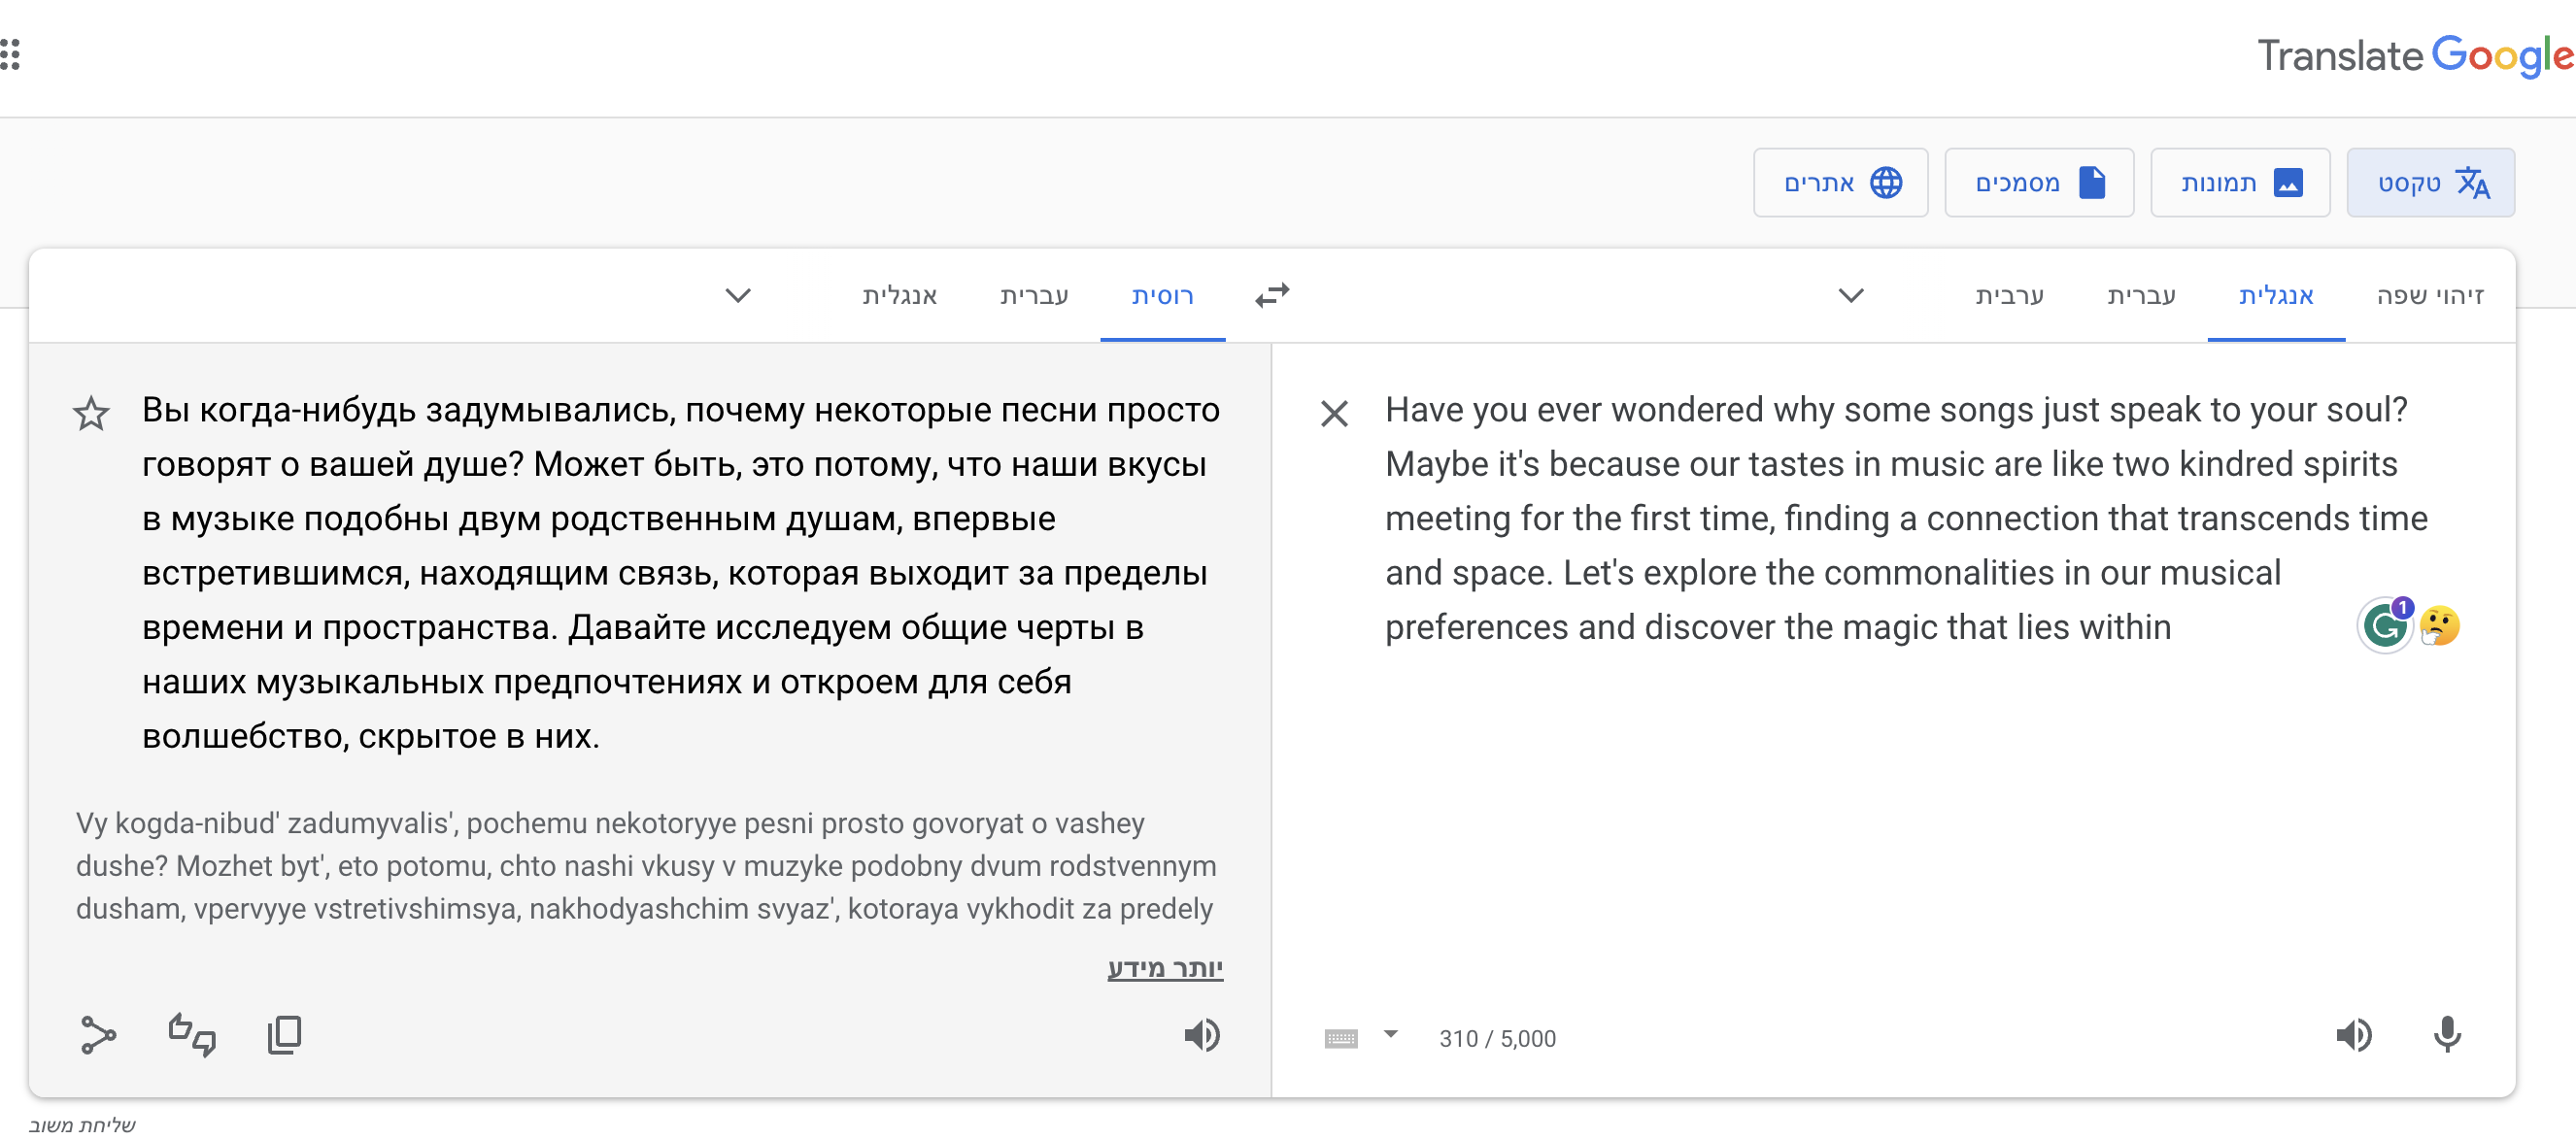
We decided to try this idea out with Hebrew --> English --> Russian flow and here is what came out.
ChatGPT:
Google Translate:
To make it even more fun, we reformatted the output as a poem:
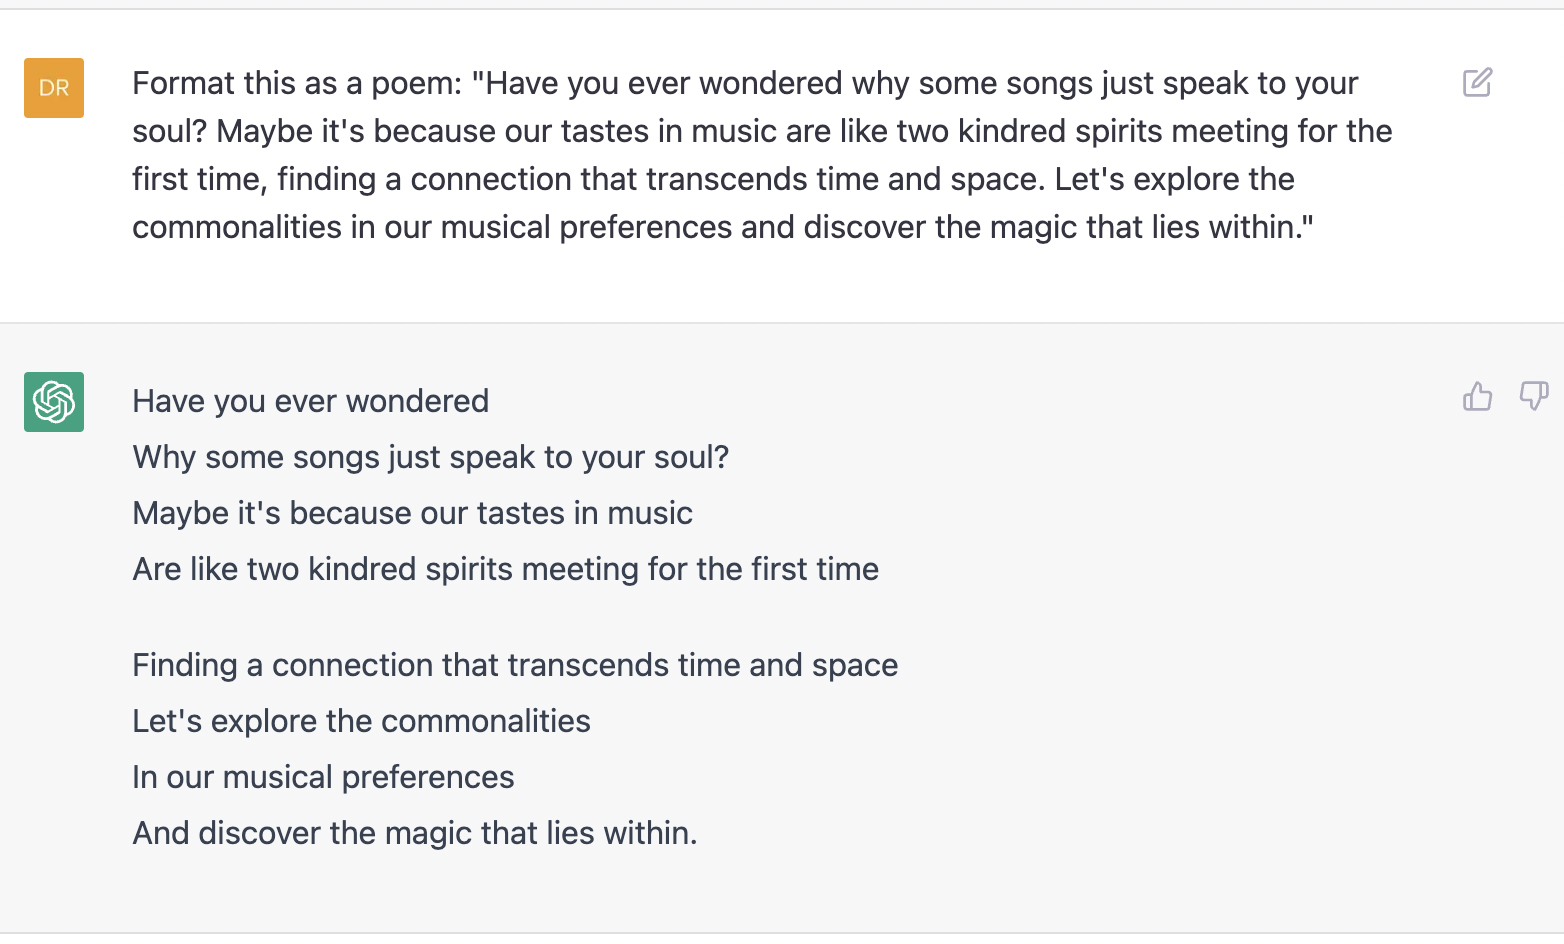
This was a very fun expriment. One of the most suprising and bizarre aspects of it was hearing the Russian reinterpretation of what Dror originally said while looking at him. I didn’t know what was him and what was the algorithm but we kept smiling at each other as the Russian was read out and the overall the outcome was very positive.
Creating a custom API: Arduino to TD wirelessly - 28.03.2023
By Mary Mark and Dror Margalit
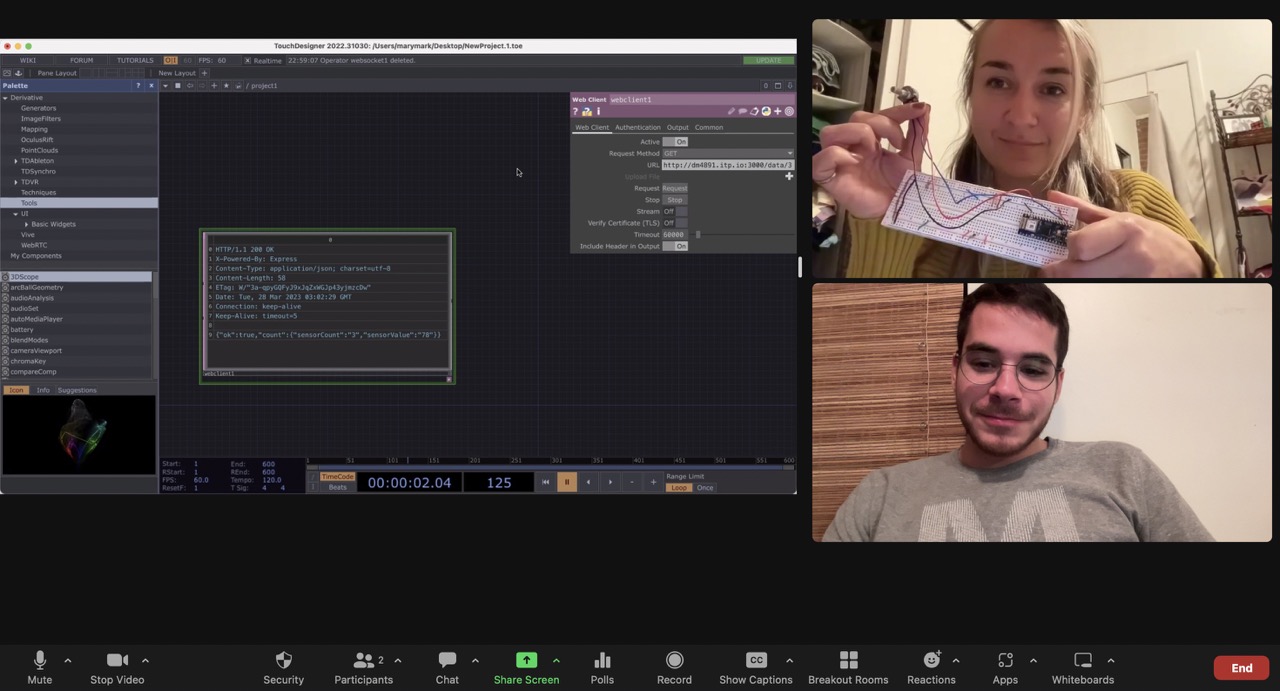
Over Zoom, from two different locations, we met to transfer information from an Arduino to a server. We connected the Arduino to WiFi, set up a server, and voila: Mary could send data to a remote server and it showed up on Dror's screen. From there, the possibilities are endless, connecting data from the real world and sending it anywhere.
An image of the potentiometer in Touchdesigner
Our end goal for this application was to connect the Arudino to Touchdesigner through WiFi and control visuals remotely.
Server
First, we set up a Node.JS server to receive JSON-formatted data using Express and BodyParser (as shown in this example). The data we wanted to receive was a sensor value and its number of in the sequence of the values. To achieve that we created a "post" function for the incoming data.
Then, we added two "get" functions:app.post('/adddata', (req, res) => { const { sensorCount, sensorValue } = req.body; if (sensorCount && sensorValue) { data.push({ sensorCount, sensorValue }); res.json({ ok: true, data }); } })
one for presenting all of the data
app.get('/getdata', (_, res) => {
 res.json({ ok: true, data})
});
and one for extracting only the data from a particular incoming sensor value
app.get('/data/:sensorCount', (req, res) => {
 const { sensorCount } = req.params;
 const count = data.filter((count) => count.sensorCount === sensorCount)[0];
 res.json({ ok: true, count})
 });
Once the server was up and running it was time to set up the Arduino. We used the "DweetPost" example from the ArduinoHttpClient library to send data formatted as JSON to the server.

Get all data

Access a particular data point
Touchdesigner
In Touchdesigner, we accessed the data from the server ready to control visuals remotely.

The incoming data is presented on line 9
The Arduino and server code can be found here: https://github.com/DrorMargalit/ArduinoToTouchdesigner
References:
Building a simple REST API with NodeJS and Express.
Assignment 2 - 07.02.2023
Time of Flight (ToF) Imager
Datasheet: https://cdn.sparkfun.com/assets/6/e/3/0/6/vl53l5cx-datasheet.pdf
Time-of-Flight (ToF) Imager is a sensor that works by emitting light (invisible to the human eye) and measuring the time is takes for the reflected light to reach a lens on the sensor. This sensor outputs a 8x8 or 4x4 grid of distance data that is within the sensor’s field of view (FoV). This ToF can be thought of as a very low resolution distance camera.
Sensing parameters
- Sensing angle: diagonal FoV is 63 degrees; horizonal and vertical FoV’s are 45 degrees.
- Min/max distance: 2cm to 400cm per zone
- Output data: 4x4 of 8x8 grid
- Max sampling rate: 15Hz for 8x8; 60Hz for 4x4;
- Price: 25$
- Strengths: can be used to sense directional movement; very compact; low processing power requirements since the distance sensing algorithm is simple.
- Weaknesses: doesn’t work well without a background in range (is there any way to fix the problem); relatively limited data so the applications are limited as well.
- I wasn’s quite sure what this meant in the datasheet: the VL53L5CX is able to detect different objects within the FoV with a distance information range up to 60 cm. The Histogram also provides immunity to cover glass crosstalk beyond 60 cm.
Applications (reference)
- Robotics application for scene understanding (room mapping and obstacle detection)
- Wide FoV and multizone scanning allows content management (load in trucks, tanks, waste bins)
- Gesture recognition
- Liquid level control
- Keystone correction for video projectors
- Laser assisted autofocus (LAF). Enhances the camera AF system speed and robustness, especially in difficult low light or low contrast scenes.
- Smart buildings and smart lighting (user detection to wake up devices)
- Use and object detection
- Video focus tracking: 60 Hz ranging allows optimization of continuous focus algorithm
Testing
The wiring of the sensor was relatively simple using I2C, where you just needed to connect the power, ground, SDA and SLC:
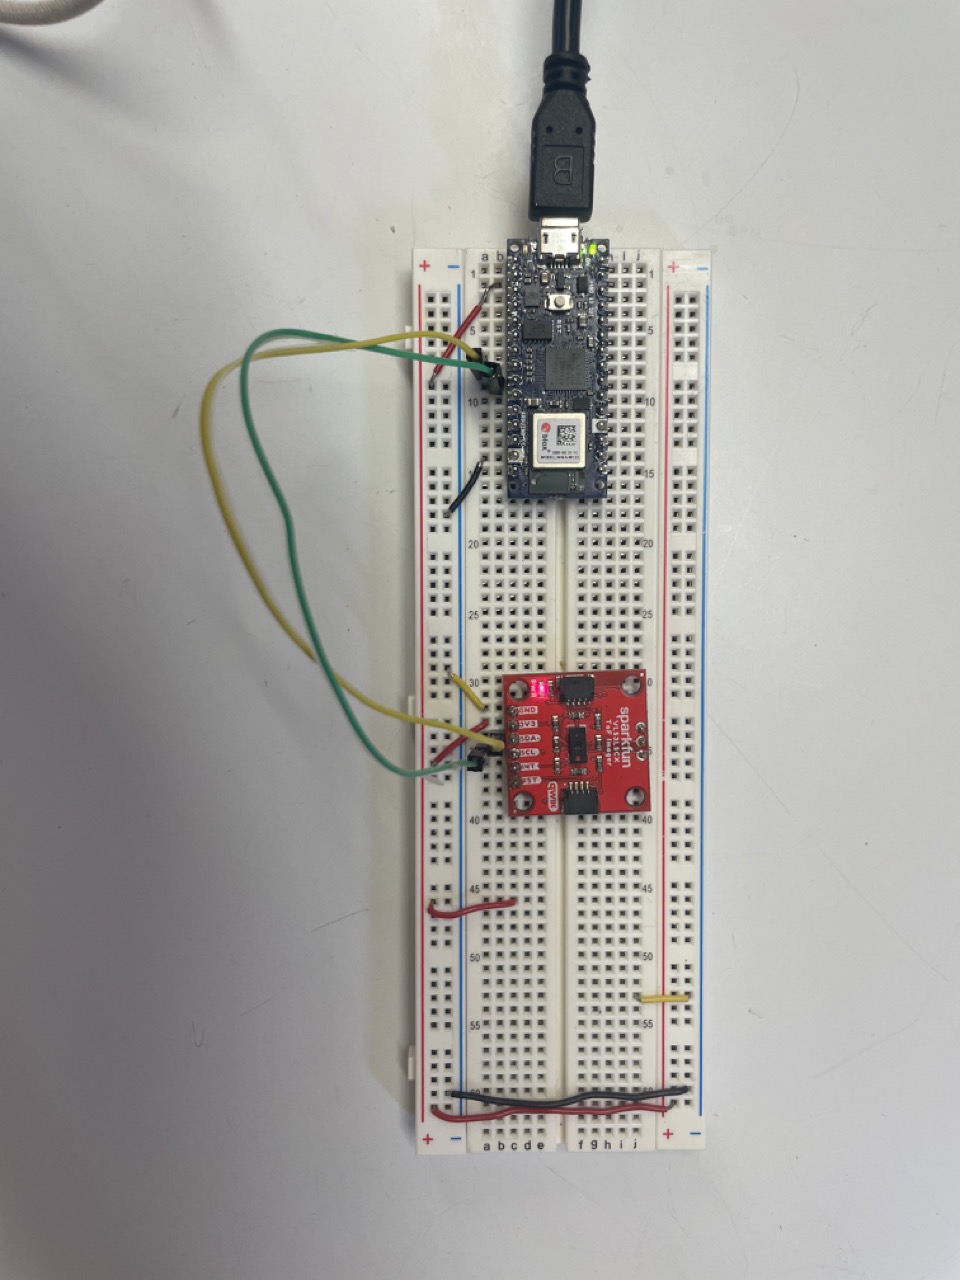
Sparkfun has a good library in the Arduino with examples, so it was relatively easy to set-up. The code just needed minor adjustments for the output formatting and a different frequency for sensor readings (changed it from the default 1Hz to 15Hz).
Finally, together with Dror Margalit, we wrote a simple code for Serial communication and visualization in p5 to visualize the output: https://editor.p5js.org/DrorMargalit/sketches/aVrJbzFZT
Here is the final testing and fun with the sensor:
One thing that we learned is that the sensor didn’t update the distance if the ‘background’ objects were >4 m away, i.e., out of the sensor’s range; the reading would remain at the last in-range reading. Maybe there is a way to fix that problem, but we haven’t found it yet.
Resources
https://learn.sparkfun.com/tutorials/qwiic-tof-imager---vl53l5cx-hookup-guide#introduction
https://www.digikey.com/en/product-highlight/s/stmicroelectronics/vl53l5cx-time-of-flight-ranging-sensor
https://github.com/sparkfun/SparkFun_Qwiic_ToF_Imager_VL53L5CX
Assignment 1 - 31.01.2023
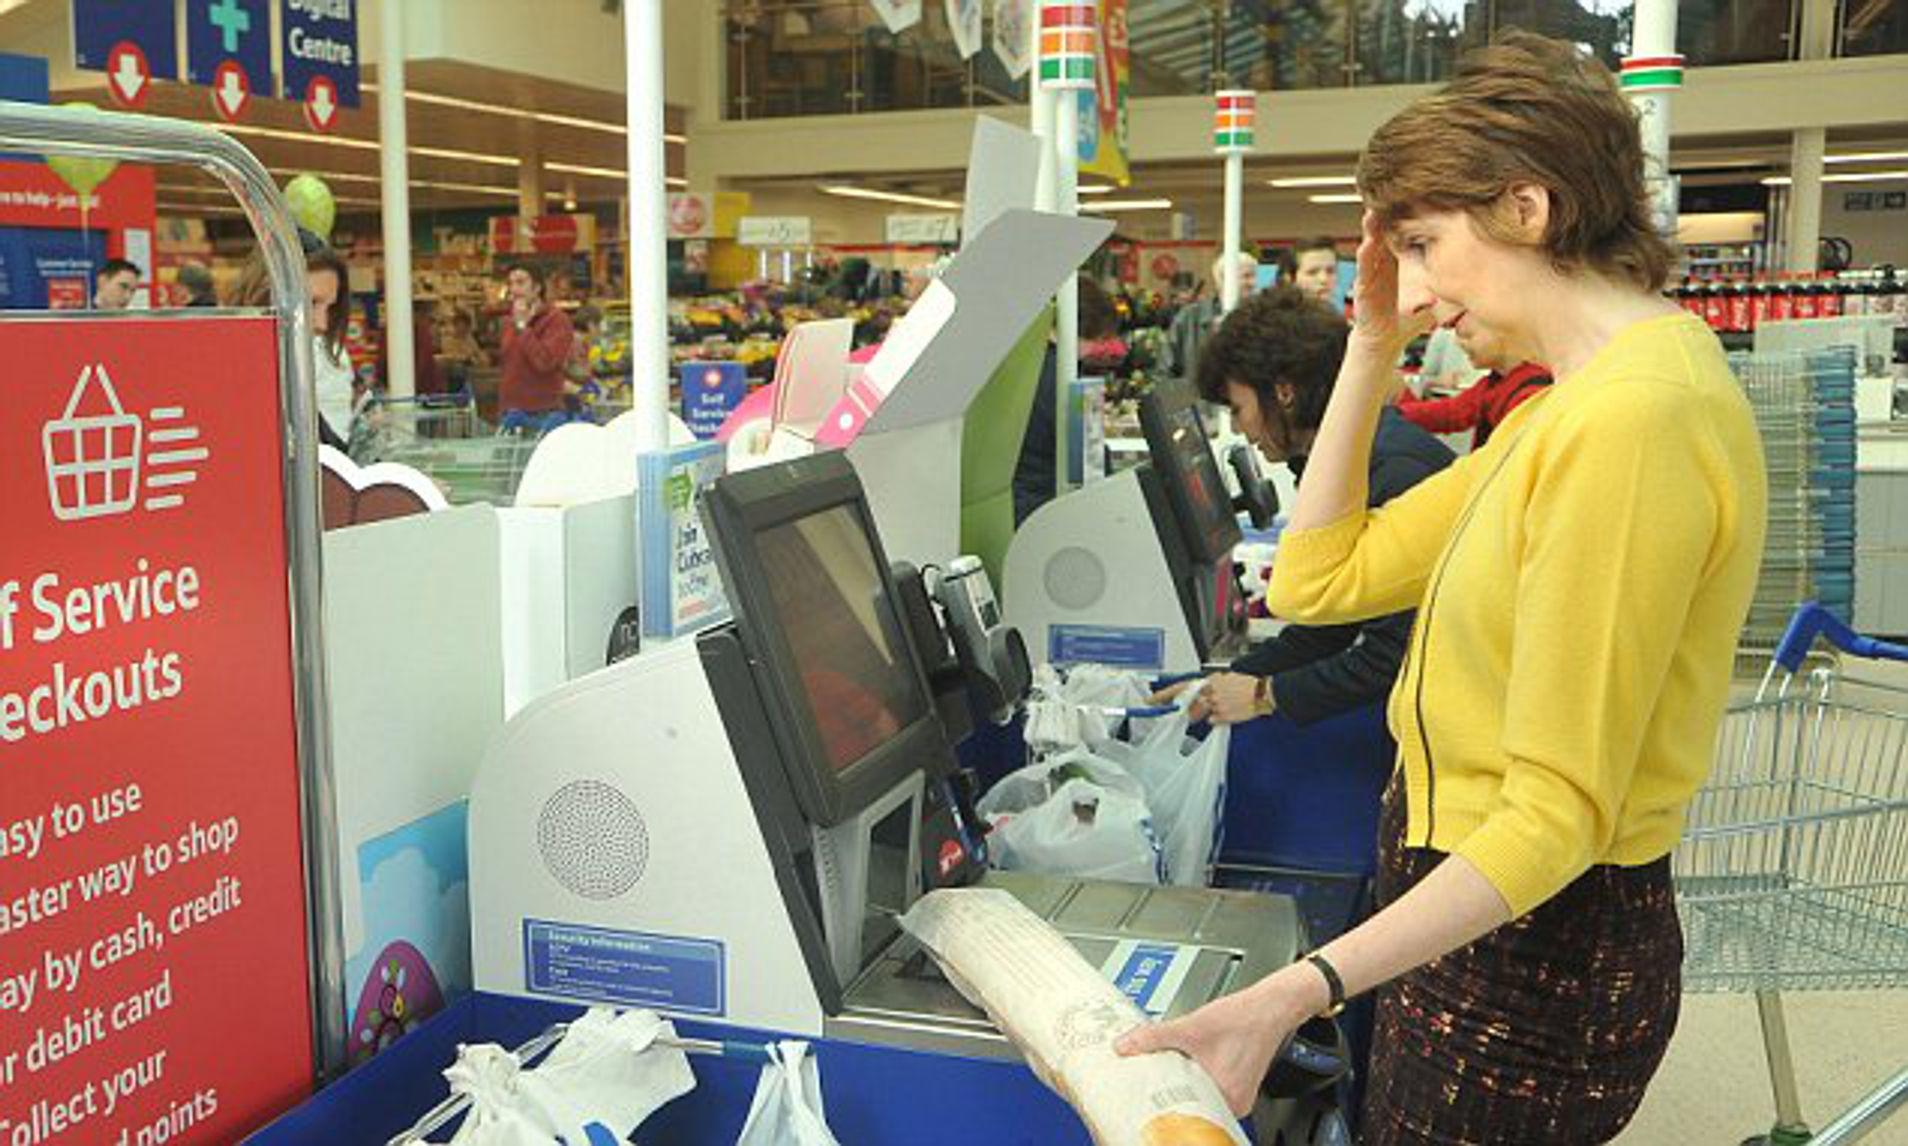
Intangible Interaction Among Us: The UNIQLO Experience
For our intangible interaction (me, Elif and Vera), we chose the new self checkout in UNIQLO, which for first time users often feels like magic. You just place your clothes in the bin and the check-out automatically knows what is inside without anyone explicitly scanning the items.
One of my assignment partners, Elif, went to investigate and here is what she observed:

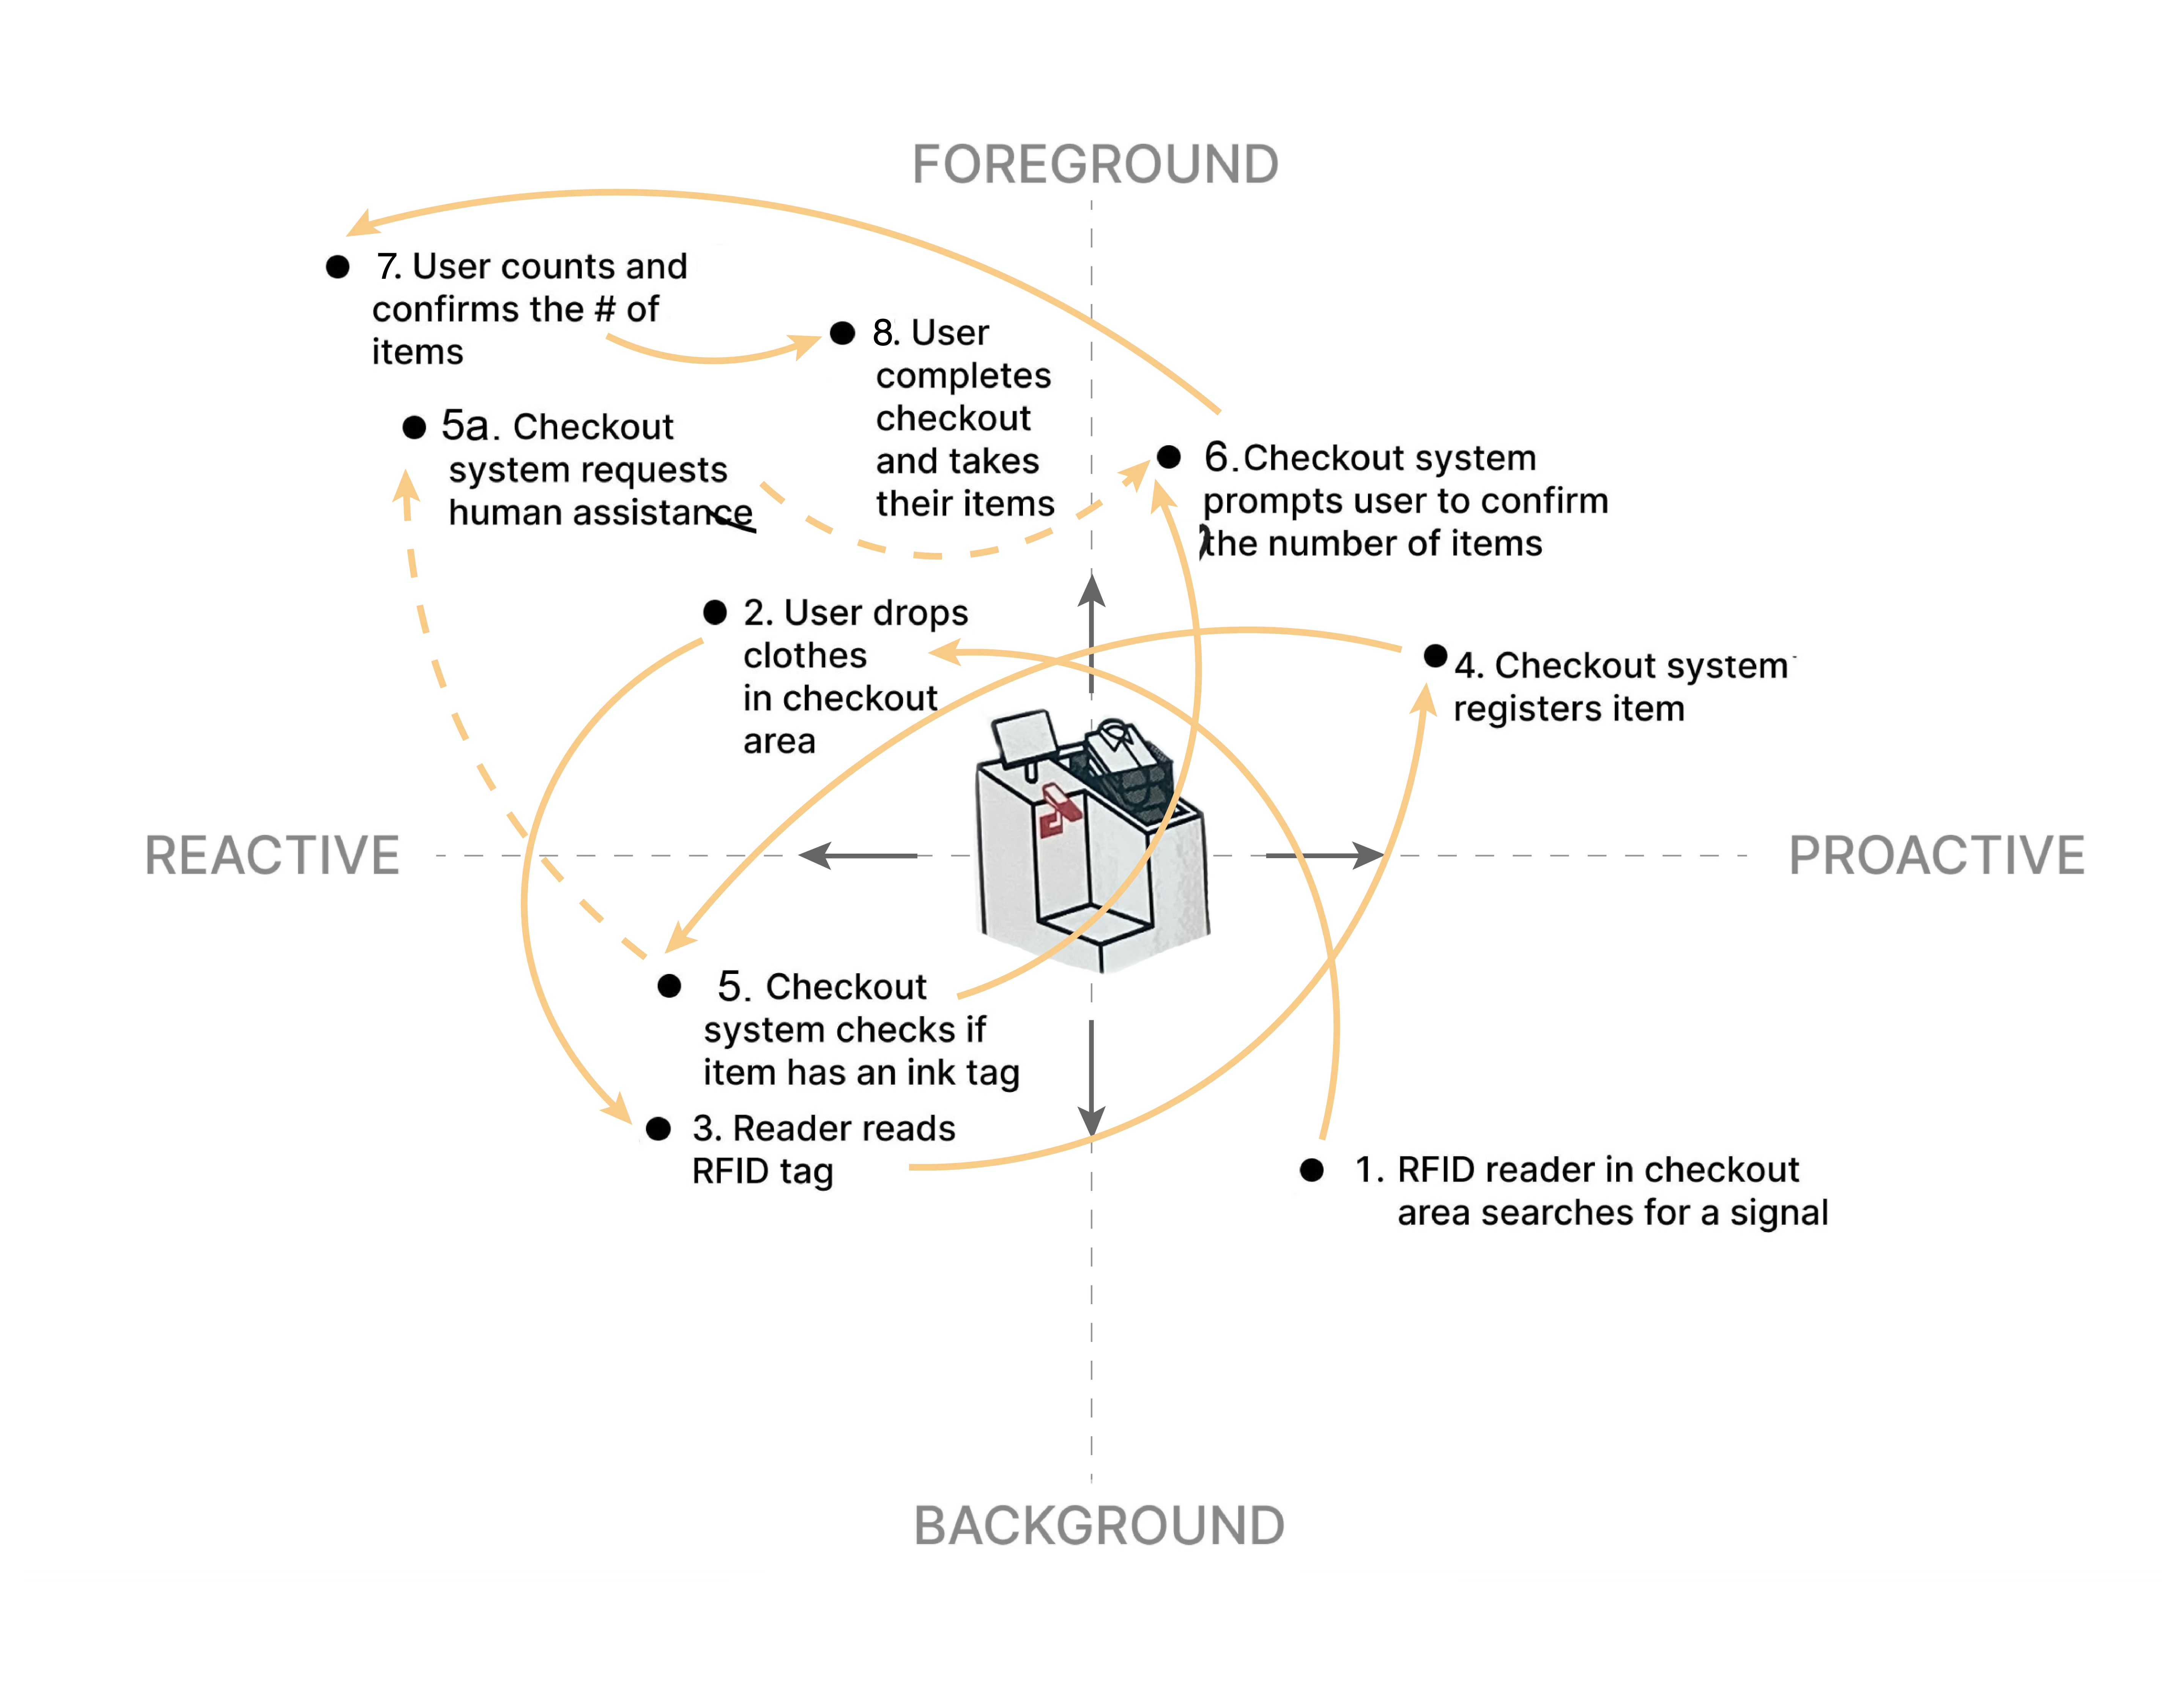
Self checkout steps (some steps are not including in their chart but is a crucial part of the process:
1. Place items/basket in the scanning areaa
- Enter the number of items. Confirm or try again
- If you get this error message: “Seek assistance from a sales
associate”, the employee will do the staff login. They will
remove the ink tags2. Touch to proceed with transaction
3. Use card reader to complete the payment
4. Bag the item in the bagging area to finish your shopping
Different types of tags
Small items only have the RFID tags. Larger pieces have both the RFID tags and the ink tags to prevent shoplifting. If they are programmed, the RFID tags are triggered when the chip crosses the detection sensor and the alarm would be triggered to alert store employees to the theft. (Link)

Implicit interaction design framework
We analyzed the RFID check-out technology using the implicit interaction design framework (graphic made by Vera)
Common errors of the system
RFID label technology is used to eliminate the barcode scanning process and create a faster and smoother shopping experience. BUT,
- Since entering the numbers of products is not one of the steps, people tend to remove everything from the basket and start counting before proceeding with the checkout. This leads to a longer buying experience.
- When you get an error message, you have to wait for the sales associate to come by your self checkout machine and separate products with the ink tags. Then, they will bring those products to the other counter to remove the tags. Once they’re done, they’ll place those items in the basket and login with their staff ids. Now, you can proceed. If you’re going to wait for the ink tags to be removed, you might as well go to the other checkout counter. (not the self checkout). This also leads to a longer buying experience.
How it works: Radio Frequency Identification (RFID) System
The self-checkout technology at UNIQLO is based on the Radio Frequency Identification (RFID) technology, which is commonly used for tracking and identification purposes. This technology came into the commercial realm in 1970’s, where the majority of early uses were related to electronic article surveillance (EAS) equipment to counter the theft of merchandise. Today RFID’s are used in numerous ways with some applications including:
- Race Timing
- Supply Chain Management
- Inventory tracking (track and record an asset’s entire life cycle)
- Tracking: IT assets, laundry & textile, file, tools, jewelry, retail, etc.
- Event & Attendee Tracking
- Access Control and Fobs
- Vehicle Tracking
- Tolling
- Hospital Infant Tracking
- Animal Tracking
- Library Materials Tracking
- Real-Time Location Systems
RFID tracking system has several advantages over other systems (like barcodes, for example):
- Does not require line-of-sight for scanning that barcode tracking systems use, making RFID a much faster and simpler tracking process.
- Hundreds of tags can be read in seconds
- RFID tax can be very durable.
- RFID tags can hold more data than other types of tags or labels
- Read range for an RFID system can be controlled as needed from 0-150 meters
- Tags could be encrypted or locked for security tag
- Memory can be rewritten and reused
Radio-frequency identification (RFID) uses electromagnetic fields to automatically identify and track tags attached to objects. Within the electromagnetic spectrum, there are three primary frequency ranges used for RFID transmissions – Low Frequency, High Frequency, and Ultra-High Frequency. Different frequency ranges have different applications, distance ranges, and associated costs. For more information: https://www.atlasrfidstore.com/rfid-beginners-guide/

System components
RFID systems typically have four components: RFID tag, RFID reader, antenna, and a computer database.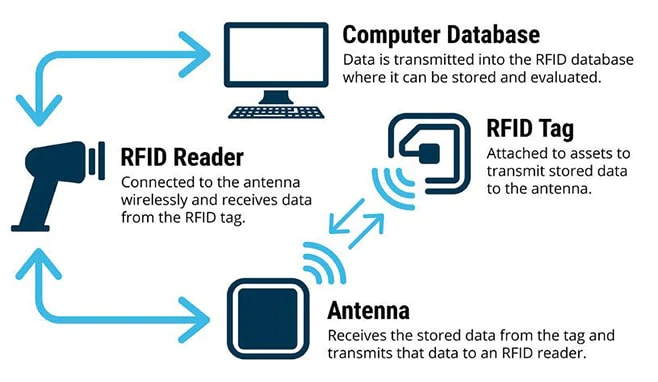 Image source: https://www.shopify.com/in/retail/rfid-technology
- RFID tag: comprised of two parts – an antenna for transmitting and receiving signals, and an RFID chip (or integrated circuit) which stores information like ID number.
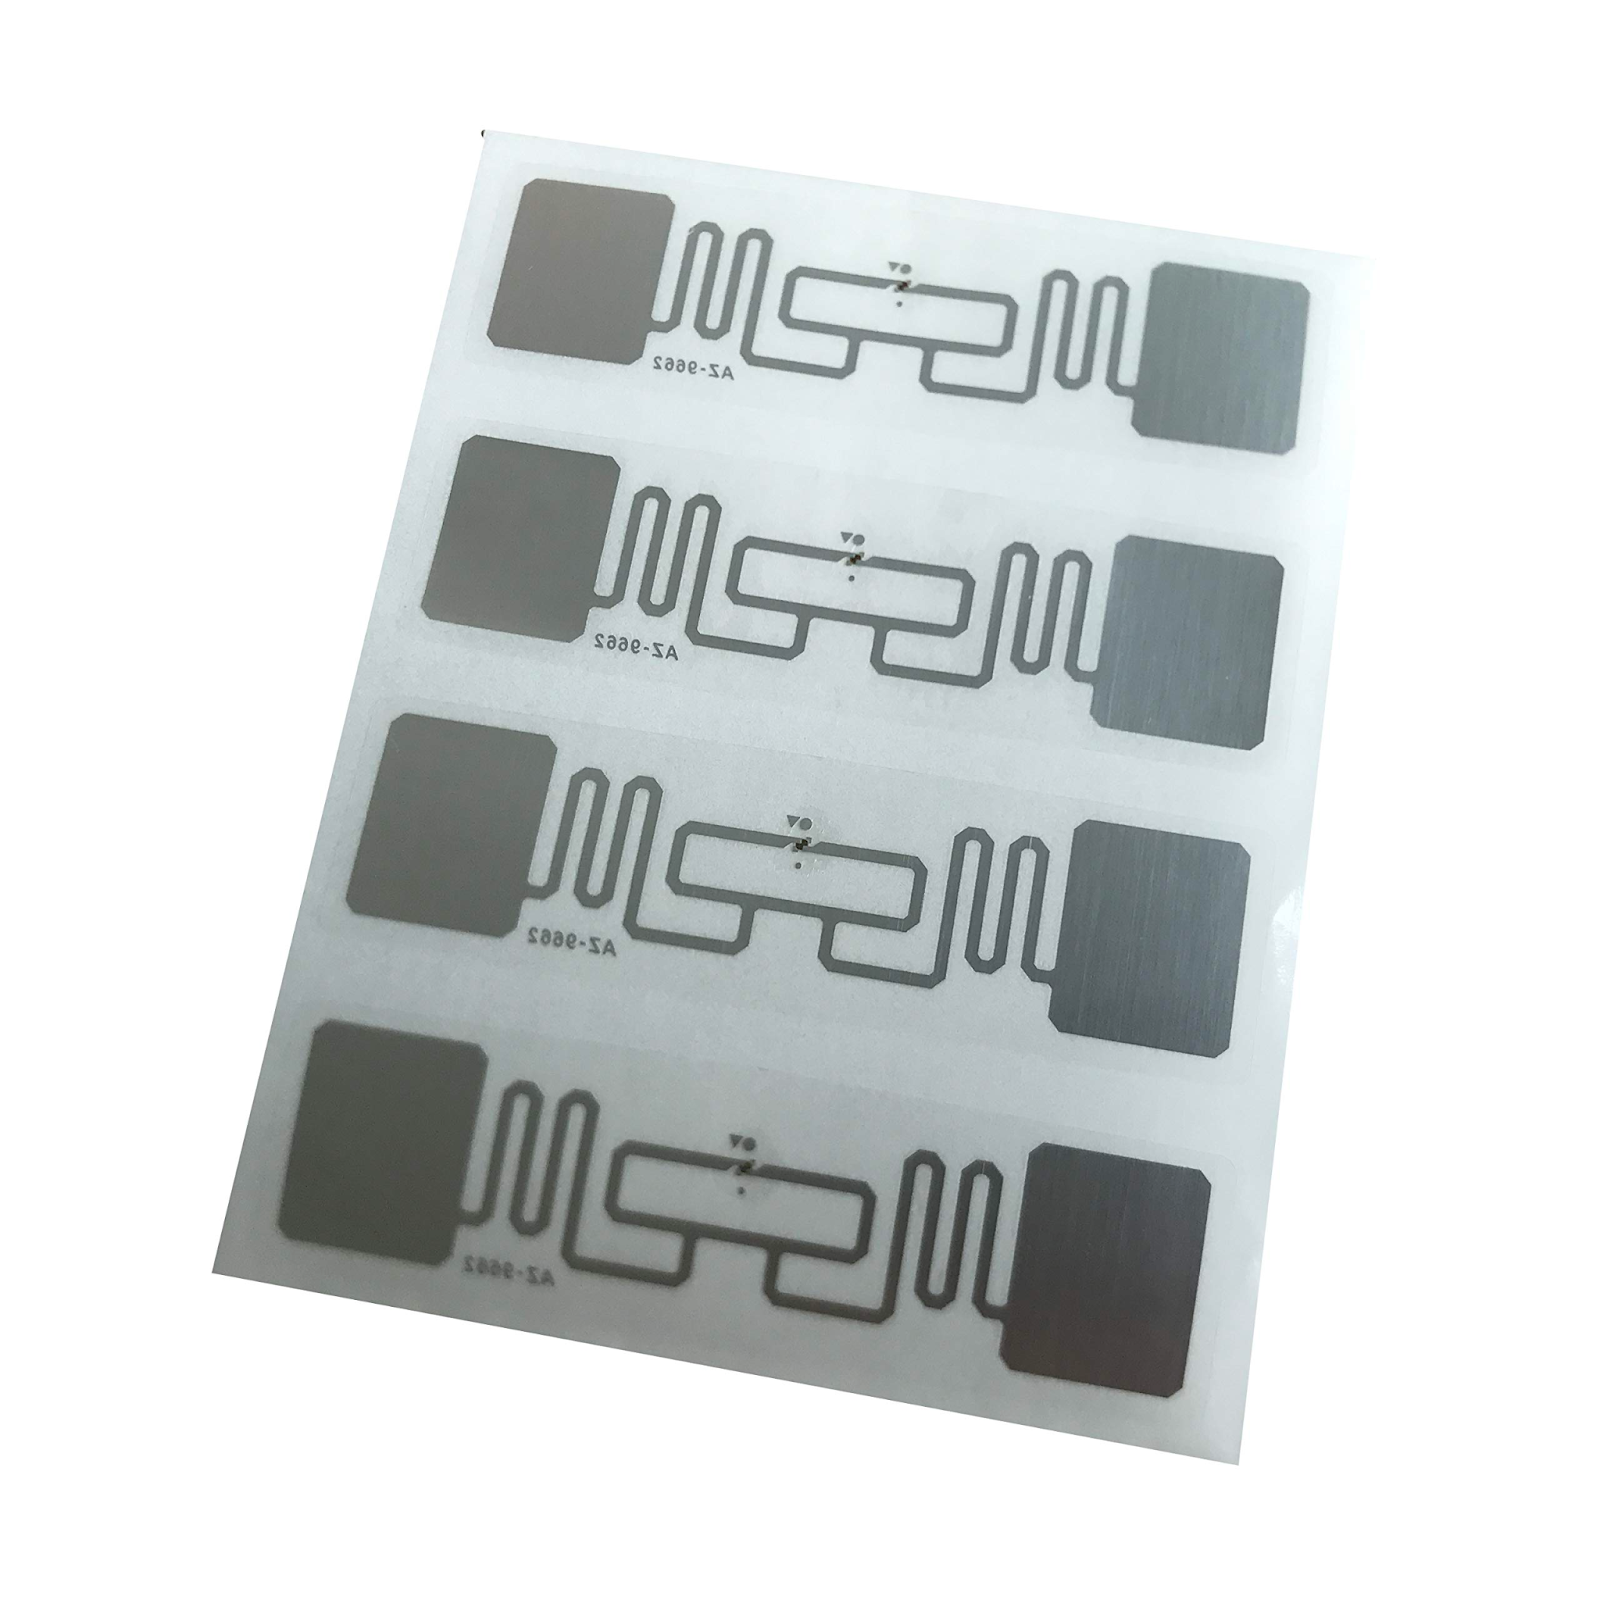
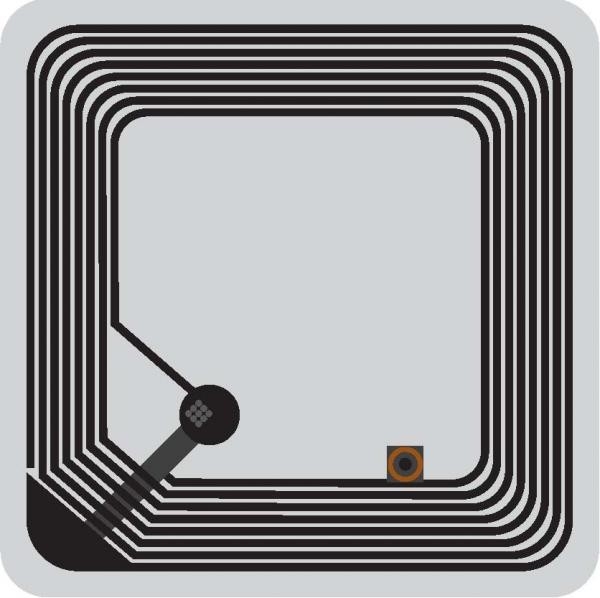
There are three main categories of RFID tags: passive, semi-passive, and active. These categories refer to how the RFID tags transmit data, and how close you have to be to pick up their signals.
Active tags use a built-in battery and onboard transmitter to send out intermittent electromagnetic signals. These typically have the largest read range and are the best choice for things like real-time tracking.
Passive tags send or ‘reflect' back a signal that an RFID reader initially sends to them. These tags do not have a battery. Instead, they receive energy from the radio waves generated by the reader. When the tag receives the transmission from the reader/antenna, the energy runs through the internal antenna to the tag’s chip. The energy activates the chip, which modulates the energy with the desired information, and then transmits a signal back toward the antenna/reader. Passive tags have a limited distance range and they are one of the better options for things that are stored for extended periods of time.
Semi-Passive tags have a battery, so have the power reserves for additional features, but no onboard transmitter. They are a good option if you need additional features in your tracking infrastructure, such as environmental monitoring. The range is still limited when compared to an active tag.
02. RFID reader (also known as interrogators): devices that transmit and receive radio waves in order to communicate with RFID tags. RFID readers are typically divided into two distinct types – fixed and mobile RFID readers. These also require power.
03. RFID antenna: convert the RFID reader’s signal into radio waves that can be picked up by RFID tags. Without some type of RFID antenna, whether integrated or standalone, the RFID reader cannot properly send and receive signals to RFID tags.RFID antennas receive their power directly from the reader.
04. Computer database: receives , processes and stores data from the RFID reader.
When choosing an RFID system it is helpful to ask the following questions:
- At what distance do you need to scan for items?
- Which RFID tags do you need (Active, Passive, or Semi-Passive)?
- Do you require weatherproof/durable tags?
- What frequency do you need tags to operate at (Low, High, Ultra-High)?
Redesign
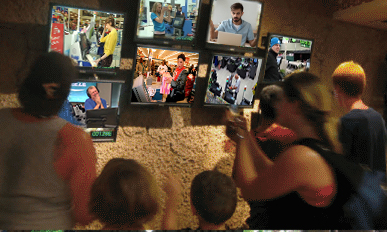
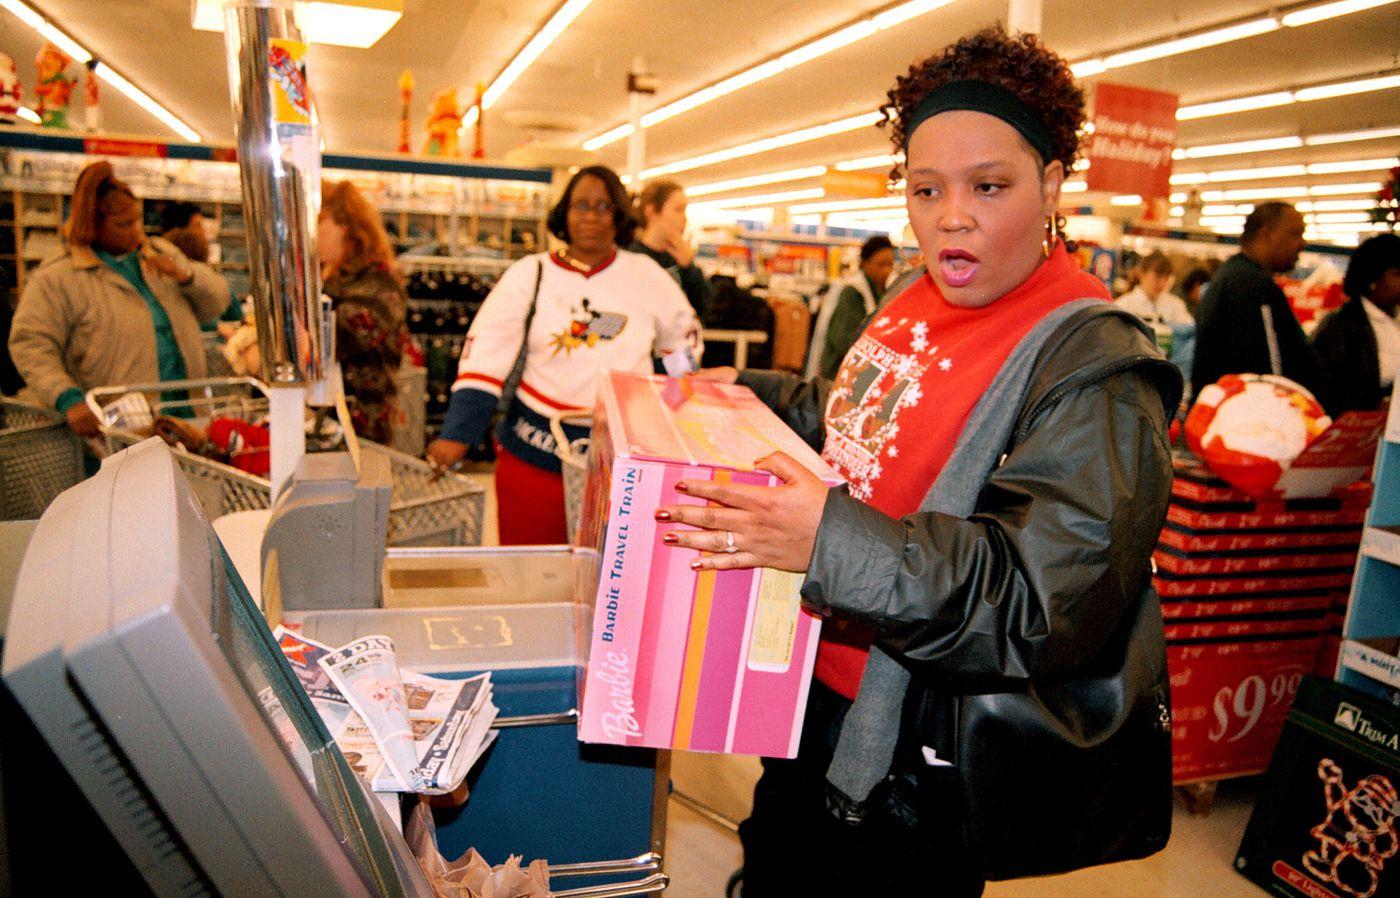
One thing that was unexpected yet delightful was watching people’s facial expressions as they used the ‘magic’ checkout for the first time. One aspect we wanted to introduce into the design is an automated candid photo capture, which would be taken at the beginning of the check-out experience. This photo would capture people’s fascination/confusion with the new technology. The images would then be shown at the exit, similar to what you would see after riding a roller coaster. As people become more familiar with the system and the candid photo process, we think that they would start curating their expressions for the photo at the beginning of their check-out experience. The customers would also have an option of printing their photo on the receipt, making this disposable item more unique and valuable. The receipt would not only be a record of what you bought that day, but also commemorate your state of being.
Data Sources:
https://tech.co/asset-tracking/rfid
https://www.atlasrfidstore.com/rfid-beginners-guide/
https://www.shopify.com/in/retail/rfid-technology
Landt, J. (2005). The history of RFID. IEEE potentials, 24(4), 8-11.